
So you are probably new to the wonderful world of Silhouette cameo machines and are now wondering whether or not they can print. Let’s look at that, shall we?
The Silhouette Cameo machine is not a printer like the ones you use when printing out a document. It does not have ink and therefore it doesn’t have the ability to print.
However, the Silhouette cameo machines do come with a print and cut feature. You also have the option to draw with your machine, which I will share more about further down this post
Let’s have a closer look at how you use these features and what you need in order to make it work.
What is Print & Cut on a Silhouette Cameo
Print and cut on the silhouette is one of the most versatile features that the machine and software come with. In short, it lets you print out an image on your home printer (ink-based) and then have silhouette cut around that image perfectly.
This feature is especially handy on projects where you want to use some intricate graphics. Some examples of this feature in use could be making stickers, or temporary tattoos, printable vinyl or window cling projects.
In order to use print and cut with your silhouette cameo, you need to do a few things. It is important that you tell silhouette, that you are now working on a print and cut project.
How to use Print and Cut on the Silhouette Cameo
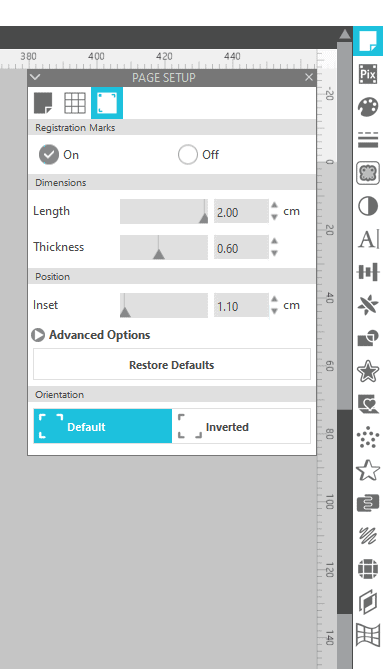
In order to do that you have to turn on your registration marks inside the software. You can do that by hitting m on your keyboard (shortcut) or you can also find it on the first button to the right in your software, under “page setup”.
Once you turn on your marks, you will see that the software adds some marks on your paper. These are the marks that your silhouette will later read to make sure that it is cutting in the right spot.
You see, your silhouette comes with a little red laser beside the cutting blade, and that laser will read the registration marks when you send your silhouette machine to cut. Reading these marks will make your cuts accurate.
Another thing you need to remember when working with print and cut is that the size of your paper is correct. On the same button as on the picture above you can easily put in the size of the media that you’re working with. My silhouette program is defaulting to a letter-size, however, living in Europe we use A4 and if I forget to set the right dimensions of my paper, the silhouette will be off in its cutting.
How to set up cut lines for Print and Cut
Once you’ve made sure that registration marks are turned on, and that your media size is the right one, then you’re ready to start designing and setting up cut lines along with the image that you are wanting to print and cut.
You see, simply adding the image won’t tell silhouette where to cut it. You have to do that manually and there are two ways that you can go about that
Adding a simple shape around your image
If you want your image to guide in a simple shape, like a rectangle or circle, Silhouette has some built-in shapes that you can click and drag around your image.
You’ll find these shapes on the left side of the software and you will have the option to make
- a rectangle
- a rounded cornered rectangle
- a circle
- and a hexagon
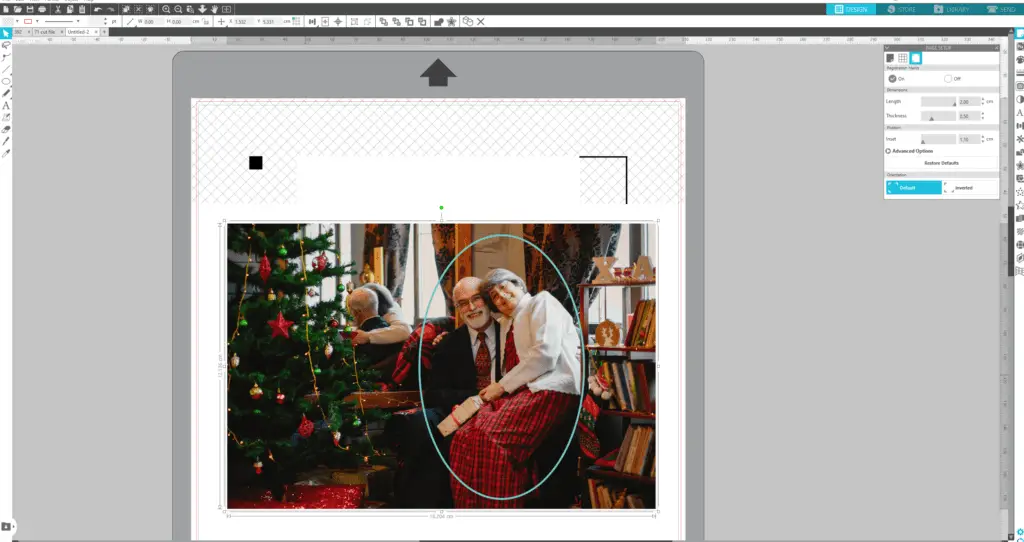
Hopefully, you can see what I mean in the image above, where I have added a circular shape to this cute picture of an elderly couple. Using this as an example silhouette would register the marks, the black marks, and then proceed to cut the oval that is outlined in light blue in the picture above.
So your printer would print the image out with the marks on your paper, and you can then have silhouette cut around the exact place in the picture, that you would want.
Adding an intricate cut line around your image.
maybe you have another project in mind, where you need your silhouette to cut an intricate shape. This is where tracing comes into play.
The trace function in Silhouette Studio will give you the option to tell Silhouette to cut around an image. Let me show you what I mean.
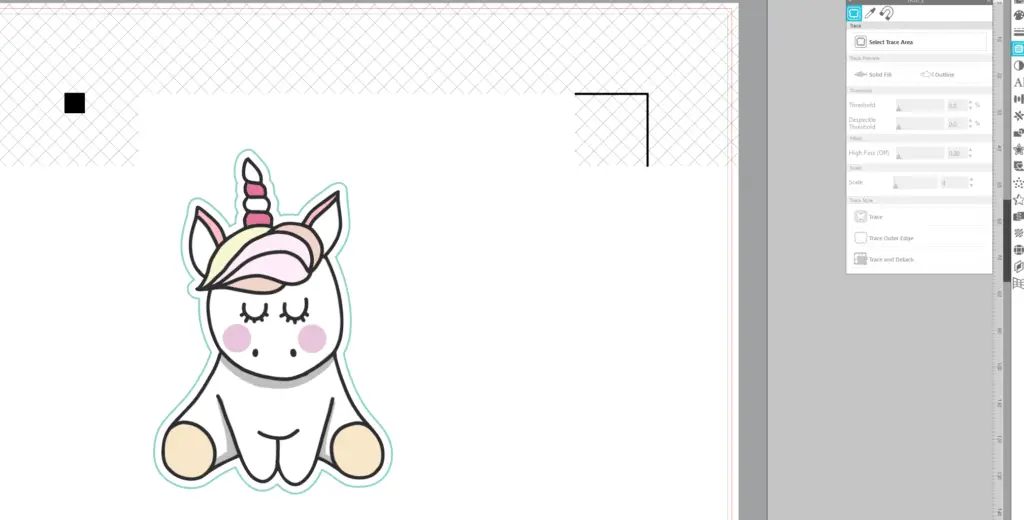
Do you see how the cut lines are now placed around the unicorn? This is what the tracing function in silhouette studio can do. To trace an image you need to use the button on the right, that looks like a butterfly.
You simply click and drag over your image to make a box. Silhouette will then highlight what it thinks you want to cut in yellow. When the outline of your image is clearly defined, you click on “trace and detach”. This will separate your image from the background. Silhouette Studio will now know to cut precisely around your image.
You can now go ahead and delete the background so you are only left with the object you want your machine to cut.
If you want to make a border as I did in the image above, you will need to offset the cut lines. You can do this with the button that looks like a star. Make sure that your image is selected and then click on offset. Then pick the border width you want and click apply.
How do I get My silhouette Cameo to print
So now that you have a Print and Cut File ready to go, how do you send that project to your printer you might ask?
This works a lot like any other program where you have to print out a document. You need to tell the program that you want to print out your design. You can do this by going to file -> Print. And then select the printer that you want to use.
On a Windows computer simply press CTRL+p to pop up the printer dialogue box as well. I like to know my shortcuts as it gets rid of some steps in the process.
Once you have your design printed out on your paper it is time to load it into the Silhouette Cameo. You want to look at your screen and see how the marks are lined because, in order for this to work, the paper needs to be in the right orientation and loaded properly on the mat.
When your paper is secured to your mat, You need to load it into the machine. Now you click on “send” in the software and from here you get to cut out your design.
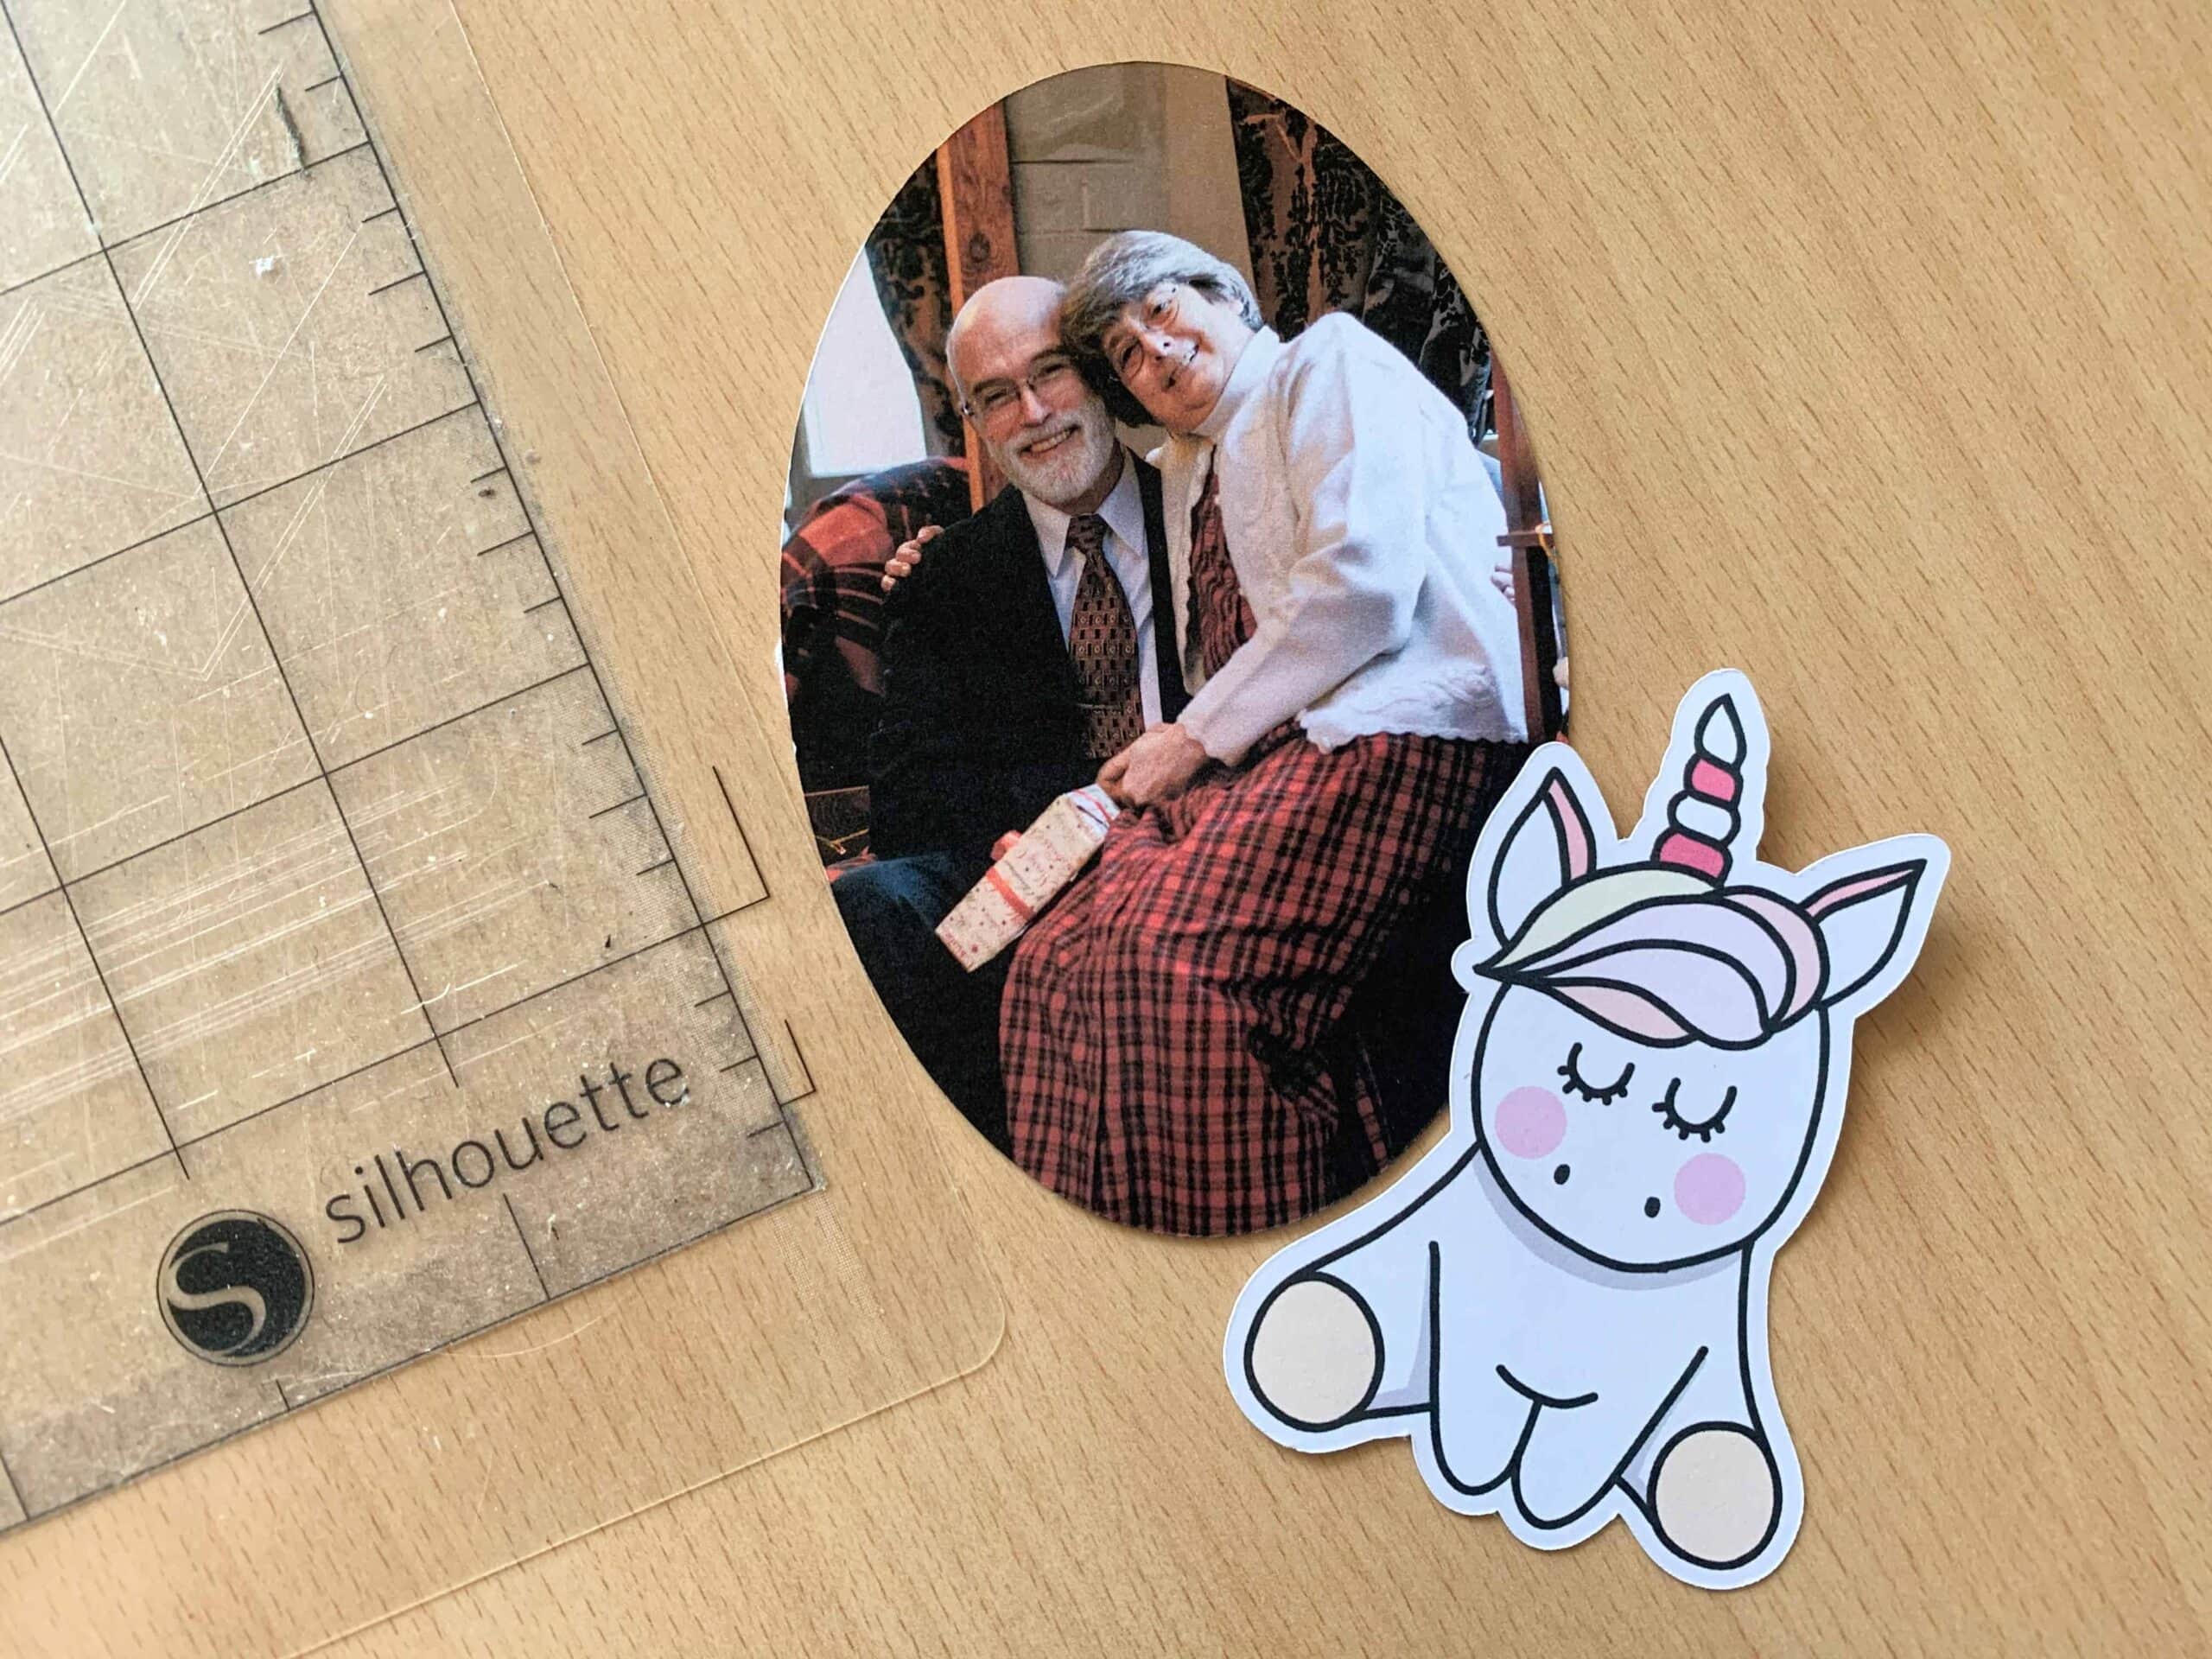
This is what the two images I have used in this post look like when they have been printed and cut using the Silhouette Machine.
There are no limits as to what you can print and cut and I am sure it is going to be one of your favorite features that your silhouette cutting machine can offer.
Now how about drawing with your cutting machine as I mentioned in the beginning. Let’s see how you can do that.
Drawing with your Silhouette Cameo
Silhouette has these sketch pens that are made specifically for their cutting machines. A sketch pen can be used to draw the design you see on your screen.
So you see, it is a little like your silhouette Cameo is printing on its own.
This feature can be fun if you want your project to have that handwritten feel, as the pens will sketch out your design, much like you could do by yourself. Of course, sketching by the machine will have more accuracy than you doing it by hand. Also, it can take some time off your hands and make sure to leave you with a cohesive result.
Some places where this could be fun to use in on envelopes, invitations, cards, or maybe gift tags. You can use the pens to write out things such as names and simple illustrations.
The sketch pens work with all of the Silhouette cutting machines. For most of the machines, you need a pen adaptor. For the newest model, Silhouette Cameo 4, the adaptor comes with a sensor on the back, that lets the machine know that you are using a sketch pen in the holder. This one should be included in your purchase.
The sketch pens are placed where the blade normally goes, so you have to pop out your blade if you want to have some fun with the sketching feature. If you want to have a closer look at how the pens work and what to do, I found this little video very helpful.